Setting stylized type for your website

In this Lesson you will create type for the headline, body copy and small ad on your mock-up home page.
1. Open Photoshop
2. Open the “HomePage1design.psd” document.
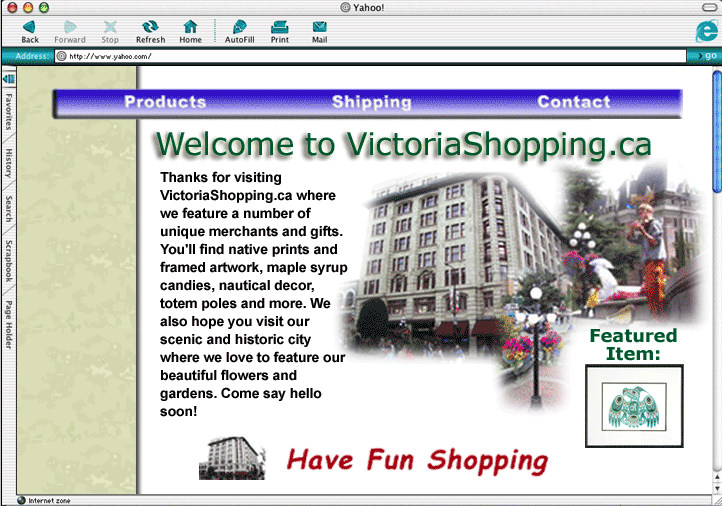
3. Get the type tool and click in the upper left part of your page. Photoshop gives you a new type layer after you click with the type tool. Type the headline, “Welcome to VictoriaShopping.ca” in an appropriate type size and style. Select that text with the same tool and try two or three other type faces and styles, picking the one that you believe works best with your design.
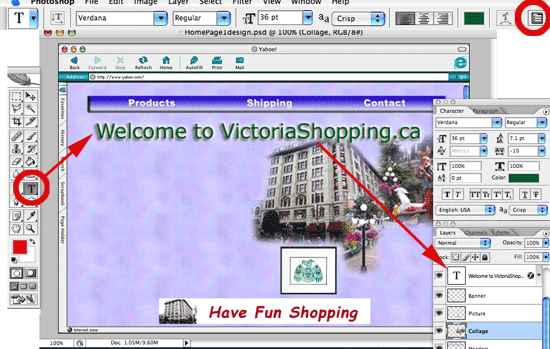
Above, the Type tool (circled at left) was used to create the headline (Verdana font style shown). Note that there are two typesetting control methods in Photoshop — the toolbar at the top of the screen, and the Character palette (click the button circled at top right to open it), and while each allow you to set point size and other choices, the Character palette gives a number of typesetting choices not available on the toolbar.
4. Double-click on the layer that holds the type — not on its’ name, but in the blank space to the right of it. This will open the “Layer Styles” dialog box.
5. Turn on a drop shadow, outer glow, and emboss effect for your type. Note that to access options for each of the styles (listed at left in the Layer Styles dialog box), you need to click on the name of that style to make them available.
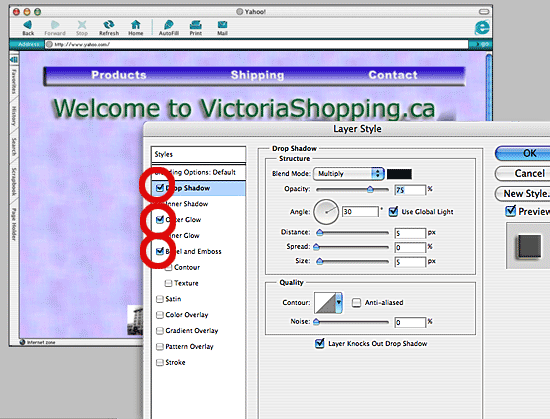
Above, the Layer Styles dialog box is open showing the three effects that are turned on for the “Welcome to VictoriaShopping.ca” headline (circled in red). The control settings for the “Drop Shadow” effect are visible because that effect has been selected at left (shown highlighted in blue). To get the controls for each effect you must click on the name of the effect in the list at left.
6. Click on each of the styles you have selected and consider changing different options. Make the outer glow larger than the default setting.
7. When finished, close the Layer Styles box and use the move tool to position the type where you want it.
8. Now create a smaller heading above or to the left of the product picture at lower right. Use the same process you did to create the larger headline above. Type “Featured Item” for the product headline.
9. Adjust the collage size if need be, by first shift clicking the three layers, then using the Free Transform tool to size them appropriately, as a group.
10. Lastly use the type tool and appropriately sized text (approx. 14 point) to type a couple of paragraphs of introductory text on your home page beneath the headline and to the left of the collage graphic. Make it up, or you may use the following: “Thanks for visiting VictoriaShopping.ca where we feature a number of unique merchants and gifts. You’ll find native prints and framed artwork, maple syrup candies, nautical decor, totem poles and more. We also hope you visit our scenic and historic city where we love to feature our beautiful flowers and gardens. Come say hello soon!”
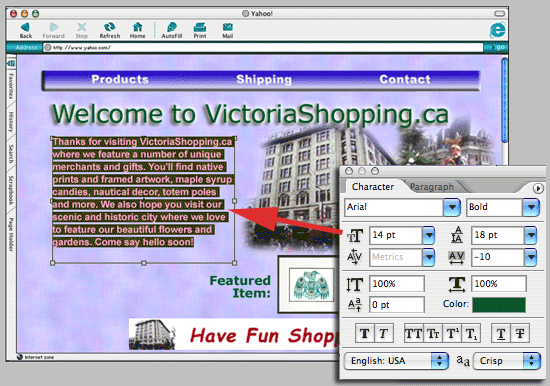
Above, the Character Palette was used to set the type options for the paragraph which was cut and pasted into Photoshop direct from this lesson page.
11. Save the image as a PSD file.
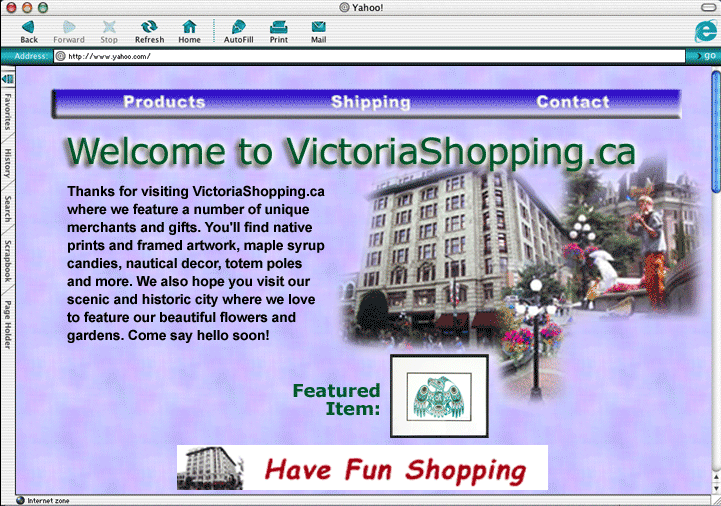
12. In the course of following all eight of these tutorial lessons, you have created two possible backgrounds for this website (shown below), which you may now consider by turning on and off the layers containing these backgrounds. You will probably reposition the collage, headline, copy and other elements to fit each background. As a web designer, you might choose to show both options to your client and allow them to choose the final look of their site.
About the Author: Scott Frangos is a web developer, college instructor and graphic designer. He is Managing Editor for WebHelperMagazine, and is also writing two forthcoming books for Web Masters. He lives in Portland, Oregon with wife and partner, Pepper, and their three dogs: Wisdom, Spirit, & Steggman.
This concludes the “Art for Web” eight tutorial series on creating a website using Photoshop.